
Author: Command

Dissolved Oxygen in Brewing

DISSOLVED OXYGEN

BACK TO NEWS

DISSOLVED OXYGEN


Dissolved Oxygen in Brewing

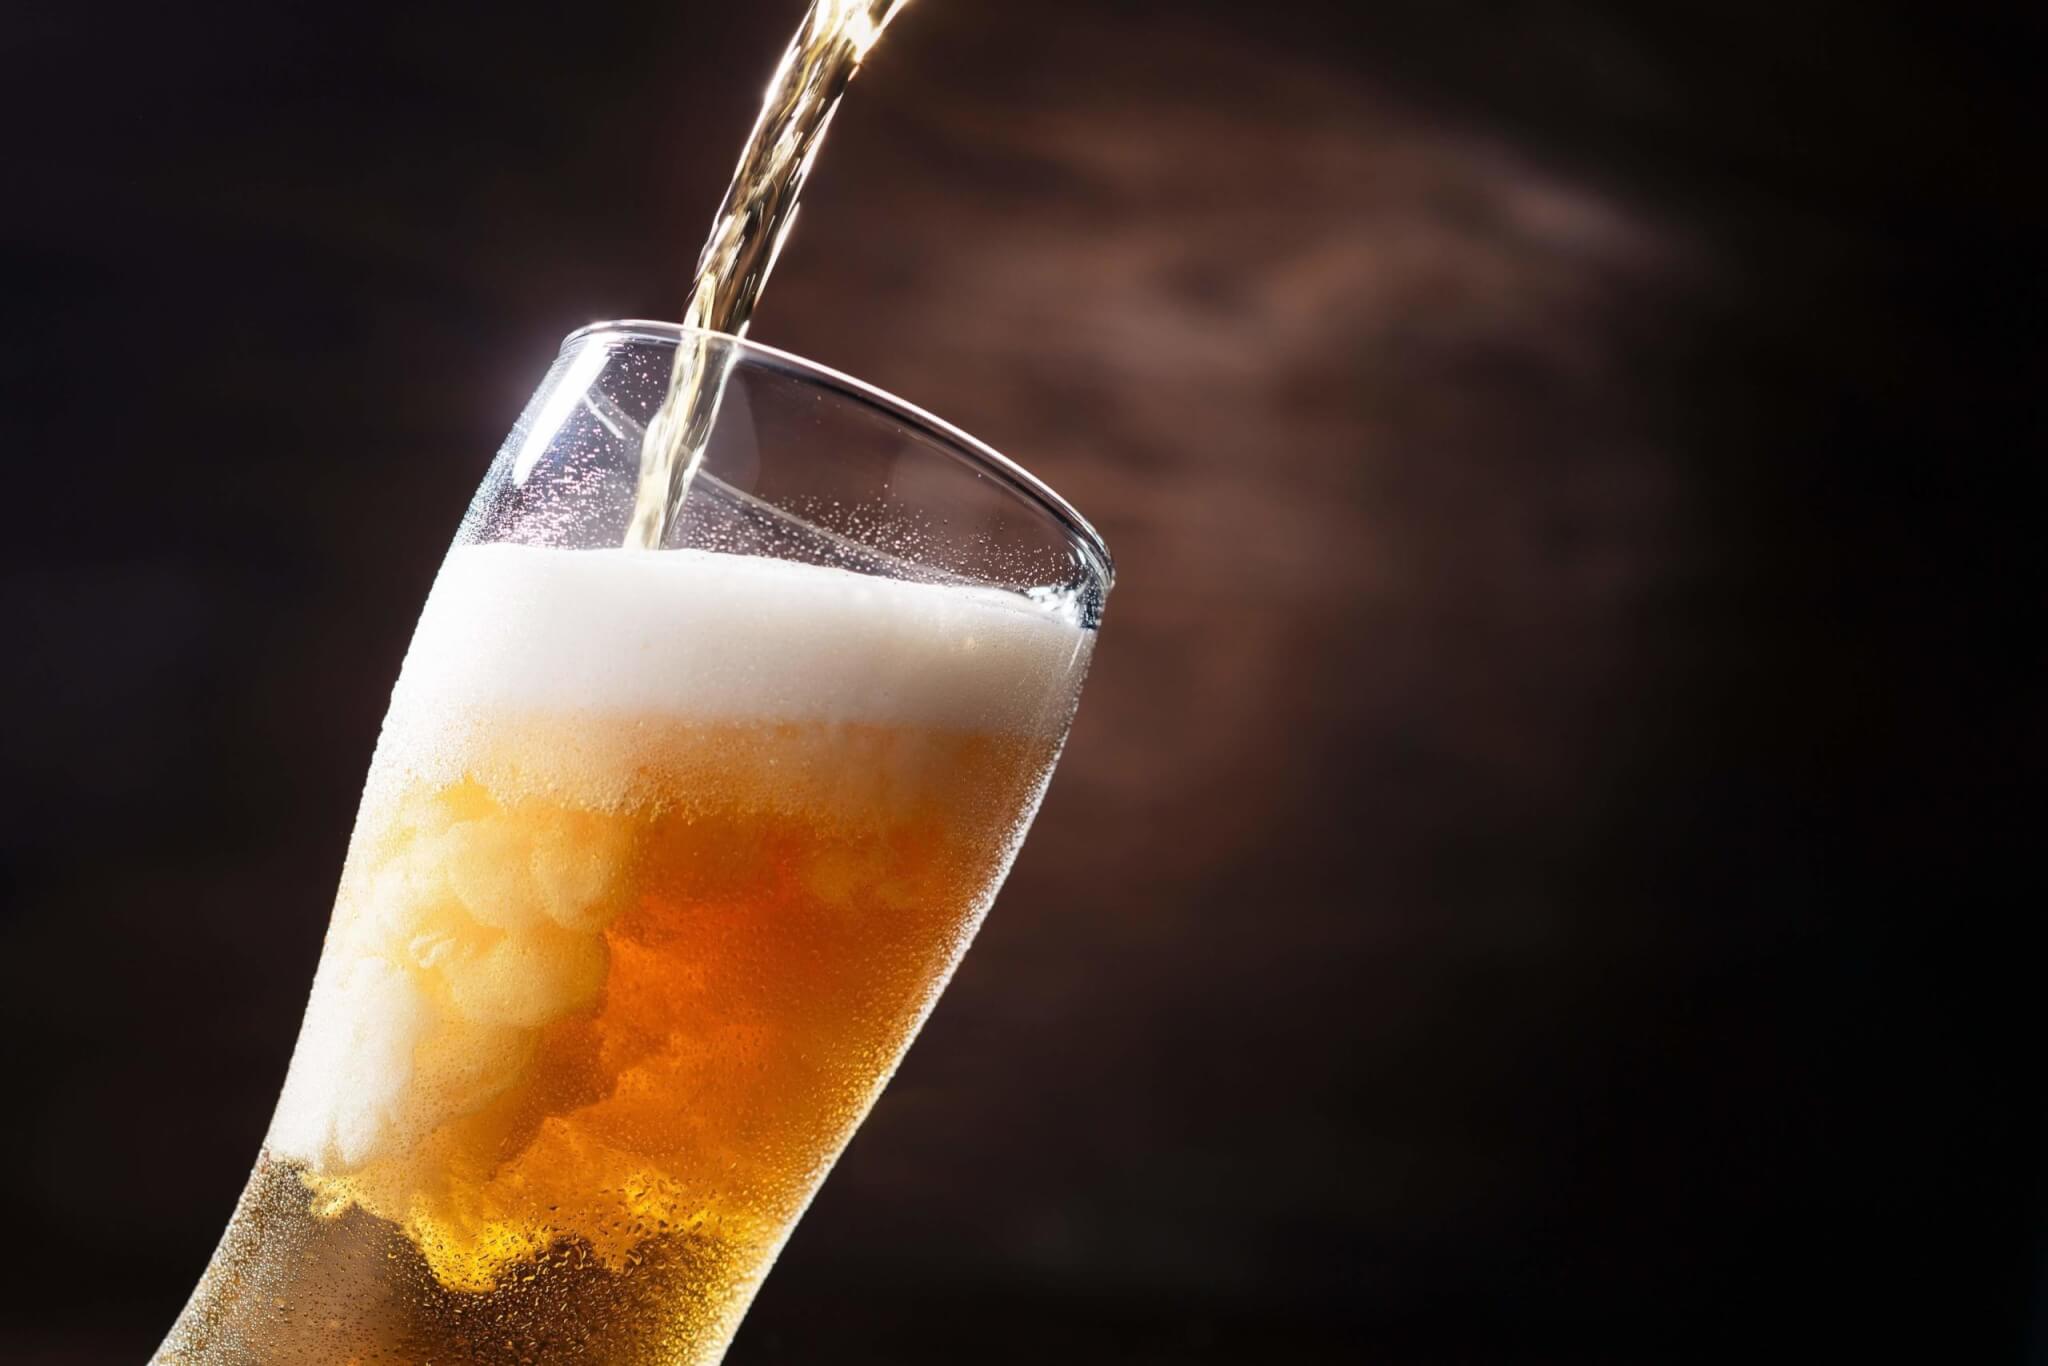
Dissolved Oxygen (or D.O.) is flat out the biggest enemy of packaged goods. If D.O. levels are high enough, beverages can take on an off taste, continue fermenting in the container, or even spoil in some situations.

This is called oxidization of the product. D.O. is measured in Parts Per Billion (P.P.B.) which is a number a little difficult to get your head around just how small that is. I will be discussing what is referred to as total package D.O. ,which is the D.O. level in the package when it is complete and ready for sale; but be aware that some D.O. comes into the process with your beverage.

All beverages have some level of D.O. in them. This is because of oxygen that existed in the water and/or some other ingredients that they were made of. Fermentation reduced D.O. because the microbes consume the oxygen and replace it with CO2, but typical fermentation cycles will not remove 100% of the D.O.

The D.O. levels will determine how long your product can be stored before they experience a flavor change. Some types of beverages are much less susceptible to oxidation than others. I suggest you do some testing to determine if D.O. is even a concern for your particular market. You may find that you can store your beverage in a warm environment for months with no flavor degradation and if this is the case, you do not need to be as concerned about D.O. levels. Small scale packagers who are packaging low quantities of product and moving it to the shelves where they will be gone in a week can live with higher D.O. numbers because the product is not sitting around long enough to oxidize.

Large scale producers who need to package high quantities to supply a larger distribution network will require lower D.O. because the product has been stored much longer by the time it gets to the consumers hands. Another factor is storage conditions, if you want to store product warm it will oxidize faster, thus requiring lower D.O. than if it will be stored cold.

In the small scale craft beverage world it is not uncommon to find D.O. numbers as high as 100 P.P.B. with perfectly acceptable results for their customers, while mid sized craft beverage folks will probably want to be closer to 50 P.P.B. and everyone should strive for the glory of 20 P.P.B. although admittedly, without flooding all areas around the open container with CO2 this is very hard to achieve.

I already mentioned that all beverages will come from the tank with a measurable D.O. level. What this means is, if you want to hit 50 P.P.B. and your beverage comes from the tank with 12 P.P.B., you now can only add 38 P.P.B. in your packaging process. Small amounts of D.O. will be added anytime the beverage is exposed to the atmosphere but most D.O. comes from handling. The more you move the can/bottle around without a cap/end on it, you are adding considerable D.O. Anything that shakes, jostles or god forbid squeezes the can will fold oxygen into the liquid and raise D.O. levels.

If your Pre Rinse of choice has D.O. in it, then the drops of rinse agent that remain when you fill will have D.O. in them also and that will incorporate into your beverage. A pre-purge is worth its weight in gold for reducing D.O. levels because it displaces all the oxygen from the container so that when the beverage comes in it is not swirling and tumbling in an oxygen rich environment which will fold oxygen into the liquid.

It is imperative that your bottle cap or can end be placed on a bed of foam. Where there is foam, there cannot be oxygen. Our testing revealed that even dropping a can end on flat versus “rolling” is on at an angle can have a profound effect on D.O. levels because the voids under the end contain oxygen which can get trapped.

When you are looking at your options for a packaging machine, I would first try to determine how low your D.O. numbers need to be. What are you packaging? How long do you plan to store it? Can you and your sales outlets store it cold? These are all variables that will help you determine how tightly you need to control D.O. levels. Lower D.O. is ALWAYS good.

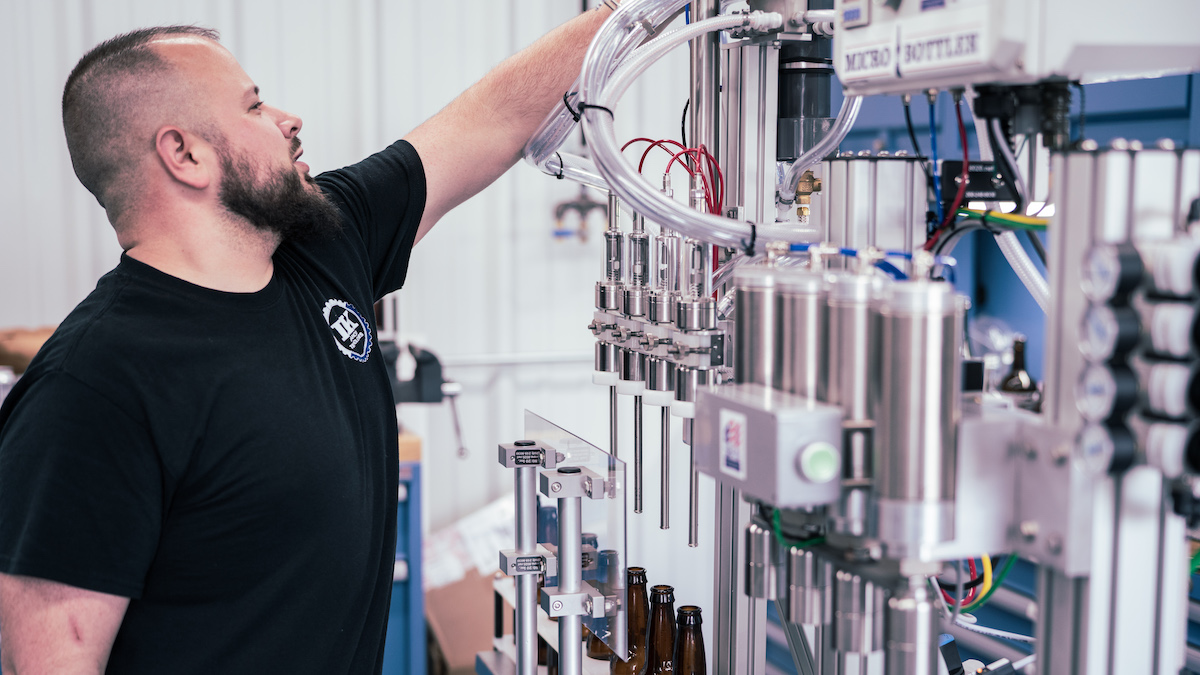
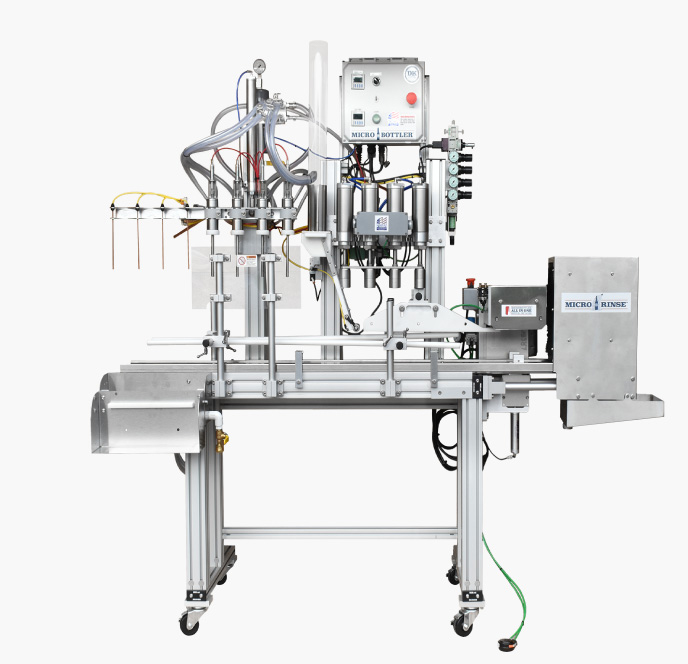
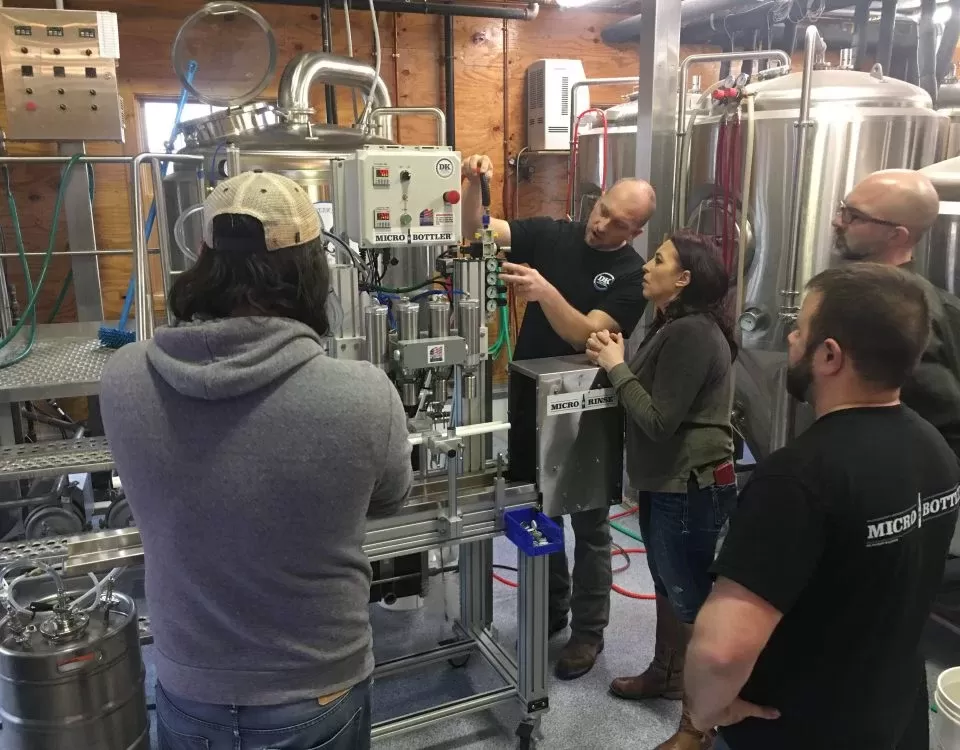
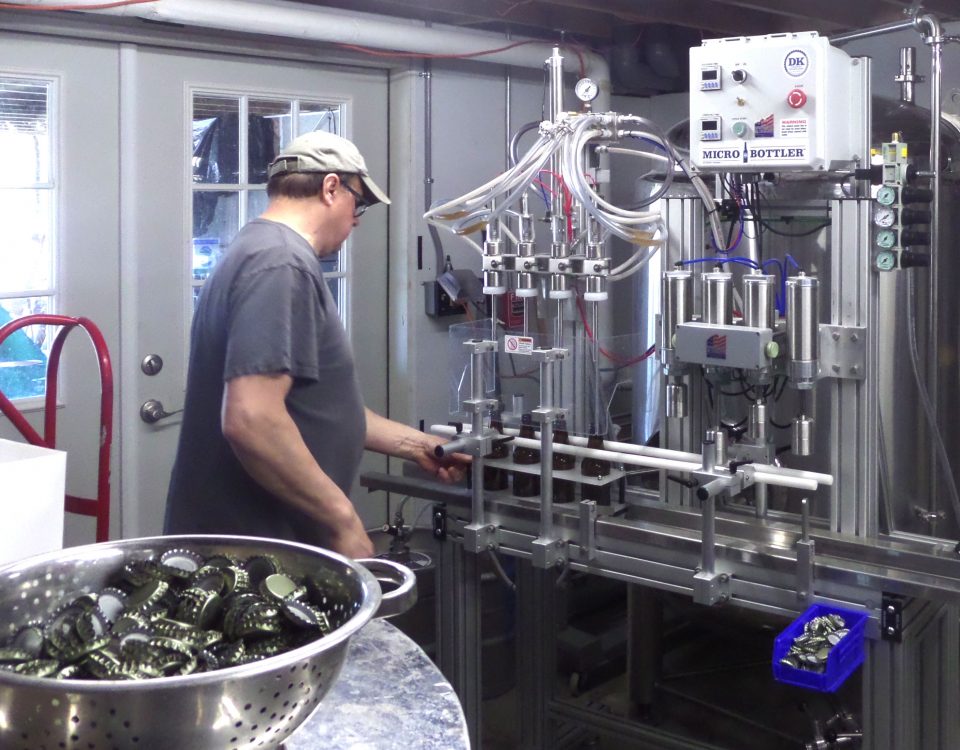
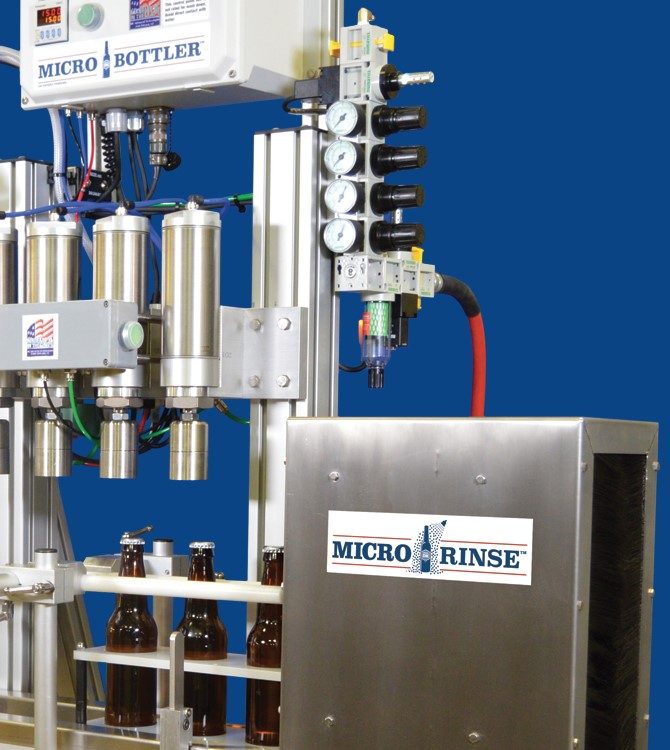
As with many other features of the MicroFilling line, you really don’t have to sacrifice D.O. when you buy our equipment. Our testing has revealed final package D.O. levels of 40 P.P.B. are easily attainable with our equipment.

  • Our Pre-Rinse can accommodate any type of supply, including kegs of degassed rinse agent

  • Cans or bottles (remember- you don’t have to choose) are held in totes which eliminates anything bumping into them, squeezing them or otherwise jostling them around during the filling, capping/seaming
  • Our Pre-Rinse provides a vert thorough purge of all oxygen from the container

  • Our counterpressure fill means the container is completely sealed from oxygen during the fill process

  • Our crown capper allows you to cap on a layer of foam

  • Our can lid presenter purges the underside of the waiting lids with CO2and rolls the lids into position in a way that does not trap oxygen
  • Our lid retainer holds the lids down into the foam while seaming is performed

    Continue reading

    Counterpressure

    BACK TO NEWS

    TURN YOUR HOME BREWING
    INTO A BUSINESS: HERE’S HOW!


    If you have been searching for a bottling/canning solution, you have undoubtedly been learning all sorts of new terms and trying to sort out machine features that have you a little confused. One of these new concepts you are trying to get your head around is probably “Counterpressure” and Counterpressure (also known as isobaric) type filling.

    Counterpressure filling is the most reliable way to fill any vessel with carbonated liquid. While some carbonation levels can be filled at atmospheric pressure if they are kept cold enough during the process, counterpressure filling can reliably handle a wider range of carb levels and temperatures. I have even heard stories of people buying an atmospheric filling machine, only to be told they must change their products carbonation level to use it. Why would you buy a packaging line that asks that of you?

    I think to understand counterpressure filling, you must first understand what carbonation is on a very basic level. To keep it simple for the purpose of packaging, carbonation is a bunch of tiny bubbles that are just waiting for you to make a mistake that releases them from your liquid.

    Common mistakes are to agitate it, warm it or expose it to a sudden drop in pressure. These little bubbles are happy living inside your liquid until you make one of these mistakes, which sends them racing for the surface with thousands of their little friends following in tow. Shake a warm can of beer, then pop it open quickly and you are creating the perfect storm of all three mistakes. Once these snappy little bubbles have escaped you are left with a flat drink. 

    The bubbles will present themselves differently in different fluids. Consider the bubbles in a glass of champaign compared to a stout style beer. There is myriad chemistry, thermodynamic and physics interactions at play here determining the characteristics of the bubbles and these differences in bubble shape, size and density all determine how hard a beverage will be to package. To keep the bubbles inside the liquid, you simply must avoid the mistakes. 

    Counterpressure filling is simply filling a container that is pressurized. By pushing a carbonated liquid into a container that is already under pressure, you keep those bubbles from racing to freedom due to the agitation action of filling the container. Once the container is full and there is no longer agitation happening, the pressure can be released. Think of the pressure in the bottle as “holding in” the carbonation while the liquid is swirling all around during the fill.

    You also want to keep everything (your liquid, the keg or tank, the tubing and all the parts of the machine) as cold as possible, because we know heat is a sure way to release the beast, but it is paramount that you fill under pressure if you want to have universal success filling carbonated liquids. A well adjusted counterpressure filler will lower the pressure of the liquid in steps, first you will lower your keg or tank pressure as low as it can be while still preventing bubbles from escaping.

    Next you will use only enough counterpressure to keep foaming under control while filling (you need a small bit of foam to ensure the bottle caps or can ends are sitting on foam for good D.O. numbers). Lastly, if necessary, you can allow the containers pressure to normalize further before finally releasing all pressure.

      Continue reading

      VERSATILITY

      BACK TO NEWS

      VERSATILITY


      ver·sa·til·i·ty /vərsəˈtilədē/

      Noun:

      Having the ability to adapt or be adapted to many different functions or activities.

      “The MicroBottler has amazing versatility.” Look at that. Right from the dictionary.

      Let’s talk for a minute about versatility. Whether you’re a small craft beverage maker who is ready to start packaging, or one of the “Big Guys” looking for a way to package your lower volume products or samples without interrupting your big packaging line; you need to get your head around how versatile the MicroFilling line of products are before you decide what to buy. Let us delve more deeply into what makes our little machine the most versatile beverage packaging solution available on Planet Earth.

      Bottling

      With most bottling solutions, you have to pick what type, and in most cases the exact size and style of bottle you want to package in. In the Bottling world it is not uncommon for a change in size or style, or even the type of cap- to require a “retooling”.

      Retooling is code word for we send a guy out to your place to change it over. You pay the guy, pay for his travel, pay for his hotel, pay for all the parts (sometimes more than half the cost of the original machine) to get your machine changed over.

      To add insult to your financial ruin, you must stand around NOT bottling, while this Tool “Retools” your machine. Then if you want to change back…. get the Tool back in here for another Retool….. I’m irritated just thinking about it.

      But fear not… You’re smart. Once you hear how great the MicroFilling system is, you’ll make the right decision. Up until now you have only heard how lame our competitors in the bottling market are. So, compare that situation with the MicroFilling line of products.

      STEP 1: You buy the MicroBottler, which is priced lower than most of our competitor’s right up front.

      STEP 2: Then when you want to add or change bottle sizes, you buy our low-cost bottle totes (they are actually so simple you could probably make them) to fit your new bottles.

      Yeah, no I didn’t forget a step. That’s really it. You just need a way to hold four bottles at the right spacing and you’re done.

      CANNING

      Before I go on with how versatile our canning attachment is, I want to make it perfectly clear that I’m talking about THE SAME PIECE OF EQUIPMENT.

      You can bottle and can with the same machine! This puts us in a class of our own here, there is nothing else that can do both. To switch from bottling to canning, all you need to do is thread off the bottle guides and thread on the can adapters for the size of can you want to fill. Adapters are available for 200, 202, 206 and 300 end sizes (that’s all cans).

      You will need the correct size tote to hold the cans during the process, and you are all changed over from bottles to cans. With a little practice, you will make the ole switcheroo in less than 10 minutes.

      And speaking of different sized cans, our new Version 2.0 seamer is the most versatile on the market. It uses standard Angelus tooling and has a simple height adjustment, so changeovers are straight forward, and our adjustments are easy to understand. It has infinite height adjustment, so it can seam cans they haven’t even invented yet!

      So, combine the new seamer that does all sizes, and the simple changeover for filling different sized cans. Then mix in the fact that it can fill, and crown cap any size bottles and you have a machine that really is the most versatile on the market.

      Continue reading

      CAN SHORTAGES, AND HOW THEY AFFECT YOU


      CAN SHORTAGES, AND HOW THEY AFFECT YOU.

      If you have been packaging in cans, or are trying to get started with it, you certainly are aware that there is now a serious can shortage. It is a worldwide problem that will likely be blamed, at least partially, on Covid19 but let’s face it we have eyes and can see that there are just a ton of craft beverage makers either brand new and packaging in cans, or switching over from bottles to cans.

      Whatever the cause, it has created a terrific problem for can manufacturers that they will most likely remedy by ramping up production as soon “they can” (sorry, dad jokes are a standard feature here). In the meantime, you’re left to deal with the inconvenience of trying to source cans for your canning, where you can (OK, I’m starting to annoy myself.)

      Here is a brief synopsis of how this shortage might affect your business, pitfalls to watch out for and ways we can help you achieve your end goal – which is to get your product packaged and turned into profit, because at the end of the day, that’s what its all about.

      Changing boats mid-stream

      Its never a good idea right? You have your MicroFilling line up and running with the cans your customers love and BAM!!! All of a sudden, the place you were getting cans from no longer has them available, and you’re forced to hunt around for a replacement. Be careful what you buy, as you might be on the verge of big problems.

      Changing can or can end sizes, styles or even just changing manufacturers of the same exact sizes and styles, might cause your seamer to need readjusting (regardless of seamer brand) and if you don’t have the right tools and a good understanding of can seam inspection, which is actually pretty darned complicated, it can be a real problem for you. If you own a MicroBottler with a can seamer: we want to help, we’re always glad to inspect your seams for you.

      Just ship us a few seamed cans full of your best product (a nice bitter IPA is always welcome) and we will drink it, cut the cans open, inspect the seams and let you know if they need adjustment and how to make those adjustments. OK OK – we’ll even do it if you ship them full of water, but we will give you a good social media shoutout if we like your product.

      If you own one of our machines and you want to learn how to inspect your own seams, give us a call and we can help walk you through the process and point you to some help on the ol’ Google Machine so you can understand it yourself. We’re definitely “Teach a man (or woman) to fish” kind of people. And if teaching you to fish means you feel compelled to ship us your product for taste testing, hey – we’re not here to judge!

      Keep your options open

      So here’s the sales pitch right – the MicroBottler is THE ONLY option on the market that allows you to bottle AND can. So in the short term, why not just step back out of the fray and package in bottles. The beauty of the MicroBottler is that YOU DON’T HAVE TO CHOOSE!

      Your customers want to buy your product, so why not sell it to them? Its really that simple, and your customers and distributors will understand, you are doing what needs to be done to keep you moving forward. Switching over to bottling temporarily can completely solve your distribution problem. When the can drought is over, you can switch back to cans, or maybe your customers will say, “You know, my dad was right, it does taste better out of a bottle.” 

      If you haven’t bought a filling machine, yet then fear not the can shortage, it’s as simple as making the right choice in machinery right now. Buy a MicroBottler without canning now so you can sell bottled goods and then later, when there are plenty of cans to be had and you have made some money, you can add the can seamer. It’s a choice that “seams” so easy, I keep waiting for cave men to start calling. (Ugh, a rare Dad Joke Double)

      If you have our MicroFilling solution already and you have reached a point where you need to be able to fill and seam different can sizes, either because your customers want it or because you just cannot get the stuff to do the 202 B64’s anymore, fear not. We are releasing Version 2.0 of our can seamer.

      It uses standard Angelus tooling and has infinite height adjustability, so it works with all combinations of standard cans and ends, from 8oz 200’s all the way up to 32oz 300 Crowlers! We have taken everything we learned from the first version and made it so much better. We are actually pretty excited about it. 

      Call us immediately for details, like right away, don’t even finish lunch just call now and talk with your mouth full, we won’t tell your mother. 518-747-0626

      Continue reading

      KEG DAISY CHAINING


      KEG DAISY CHAINING

      While filling cans or bottles directly from the tank eliminates some unneeded work (kegging, keg washing, handling kegs etc.) sometimes it just doesn’t work out that you are ready to fill when the tank is full, so you find yourself needing to fill from kegs. This is no problem at all for the Microbottler system; in fact, it’s what we originally designed it for. 

      USE THESE TIPS FOR BEST RESULTS.

      • Cold is king


        If you’re filling a carbonated beverage listen up – warmer is foamier! Ideal filling temperatures are 30-34°F (it won’t freeze because of the elevated pressure it is stored at). If it’s possible for you lower the temperature that far, you will be able to fill faster because lower tendency to foam means lower counterpressures are required, which means faster fills, so crank that chiller all the way down the day before, maybe even put the kegs on ice overnight, and fill as cold as possible – this applies to your brite tank too – colder is always better for filling.

      • Keg Daisy-chaining


        At the end of the keg, you blow CO
        2 into the lines and you get partially filled and foamy bottles or cans (not a huge deal to polish them off if you’re thirsty, but there’s a limit). Then when you tap the next keg you will have to purge the lines and cool them back down with fresh cold beverage.

        All of this is creating waste. This waste can be minimized by Daisy Chaining your kegs; that is, pushing CO2 into the gas infeed of the first keg, taking the outfeed liquid and sending it into the gas infeed of the next and so on until the last keg hooks up normally to the MicroFilling line.

        That means the keg closest to the machine will always be filled by the previous kegs until all kegs empty and you only blow CO2 when they are all empty, which will greatly decrease your waste. This will take a small investment in plumbing supplies and keg connectors but will be well worth it. Oh yeah — and when you’re not filling, you can transfer this setup to the cold room and use it to dispense into the tap. No more kicking kegs, running in to change them and having to purge the foam back out…….. you’re welcome!

        Oh, and speaking of keg connectors, they have check valves in the gas infeed port that is meant to prevent beer from flowing back out that port.  These valves will cause restrictions when forcing the beer in which can cause foaming as well. They should be removed from the keg adapters that are interconnected when using the setup for filling. You should leave the check valve in the first one in line, so it can serve its original purpose.  They are a little rubber piece with a flap that’s easy enough to remove or reinstall.

      • NOTE:

        Even if you only have one keg to can, it may help to hook up an empty keg (cleaned and filled with CO2 ahead of time) as the first keg, just to provide a buffer to supply the full keg you are canning from with a nice constant gas pressure.

      • It’s nice to be well connected

        You want to ensure the path that your beverage will flow is as unrestrictive as possible. Use the largest diameter tubing possible and keep the runs to the filler as short as possible to prevent restrictions.  The only exception to this rule is in a case where you are fighting persistent foaming.

        In this case, it’s sometimes beneficial to run the beverage through a longer run of smaller diameter tubing to slow it down. This can be required because of the higher pressures that will be needed in the keg/tank to keep CO2 in solution. Filling at these pressures without restricting flow with smaller tubing can cause excessive turbulence in the fill valve and in the can/bottle, which causes foam.

        Continue reading

        FIGHTING FOAM


        FIGHTING FOAM

        When filling any carbonated beverage, you will soon learn that foam is your nemesis…. 

        Foam is a necessary evil. Your customers want to experience the same carbonation level from your bottles or cans as they get when they are in your tasting room and you must give them that experience. BUT — to do so means that you must get that foaming frothy beast into that can or bottle without letting all that magic escape. In this post, we’ll try to break down exactly what is happening and help you understand how to keep the foaming at a minimum so that all that energy gets stored in the bottle/can and your customers can experience it.

        Foam, or simply put — bubbles, are just the CO2 that is dissolved in your beverage, escaping due to a sudden drop in atmospheric pressure, increase in temperature or agitation. The type of beverage determines the shape, size and characteristics of these bubbles and is what determines how it presents itself; fizzy seltzer or rich creamy head.

        Carbonation:

        It seems obvious, but I will mention it out of an abundance of caution; the higher your carbonation level is, the more “ANGRY” your beverage will be, and the higher tendency it will have to foam.

        In all cases, it is best to fill with your beverage at the lowest temperature you can possibly get it chilled down to. The colder it is, the less tendency it will have to release its CO2 out into the atmosphere. Here are a few points about foaming that should help you understand it and how it effects your filling process. 

        First – the two most important pieces of advice with regards to bottling carbonated beverages:

        • Always be as cold as possible.
        • Always operate at the lowest pressures possible (read on to understand how to determine this but remember, always stay as low as you can go).

        Foaming in the feed lines:

        Whether you’re filling from kegs or from a tank, that vessel will have to be pressurized. This pressure serves two purposes: to drive or displace the liquid from the tank and to hold the CO2 in solution.

        The higher your carbonation level is, and/or the warmer your liquid is – the higher this pressure will have to be to hold that CO2 in solution or “Keep the genie in the bottle”. So because of this, the feed lines is the first place where foam can enter your process. Foam that starts in the feed lines will plague you throughout the process and must be nipped in the bud at this stage before you continue on with diagnosing your foaming problem. Foaming feed lines will always provide a place for bubbles to gather at the highest point and form a large pocket of CO2 that will cause uneven filling which deepens your headache.

        Once you have gotten your feed lines chilled by flushing cold beverage into them, foaming in the feed lines is remedied one of two ways. The preferred method is to lower the temperature of your liquid. If this cannot be done, then you will have to increase the pressure of the tank or keg that holds the beverage. You must increase this pressure until the foaming stops, but do not increase it anymore than necessary. You can watch the liquid in the clear lines until you see the foaming stop. 

        Foaming while filling:

        Once you have the feed lines flowing without foam, (there will always be visible bubbles here and there, just make sure you are not watching bubbles constantly forming) it’s time to start filling.

        While you are filling you should have a thin (3/8” or so) layer of foam on top of the liquid as the level rises up. This is easy to verify with bottles, but a little more difficult with cans unless you have X-Ray vision, which must be awesome for you. With cans you have to monitor how much foam is expelled into the vent lines before liquid is visible.

        If the foam is excessive, there is only one remedy. If you are using cans – this is where you should be glad you bought the right machine because counterpressure is the answer and many of our competitors do not use counterpressure for can filling. You need to increase counterpressure to keep that foam while filling at bay. The closer you raise your counterpressure to the pressure of the tank/keg, the slower the liquid will flow, so you will likely also have to increase fill time.

        Foaming after filling:

        After your containers are filled you can sometimes experience foaming before you get the bottle cap or can end on. If this is the case, it is usually caused by counterpressure or temperature too high. Remember, always be as cold as possible (you’re getting that right? colder is better).

        So the solution here is to lower counterpressure – but wait, you say you had to raise it to where it is so you can control foaming while filling…. Well, sometimes it’s a very delicate balancing act. This is where that second piece of advice comes in – always use the lowest pressures possible. If you can lower that keg/tank pressure a couple PSI without starting a foaming problem, you can lower your counterpressure the same amount. Or perhaps you can lower your counterpressure and live with a little bit more foam while you’re filling, and if you can do either or both of these –  you may just eliminate that little “POP” you get when you raise your fill heads and that can eliminate your foaming problem after filling.

        Another trick: if all else fails, is to just wait a few seconds before you lift the heads. Usually, your counterpressure will slowly leak down a bit which means a more gentle transition to atmospheric pressure. For some beverages you might have to develop a habit of counting to 10 or whatever works for you, before lifting the heads.

        In an absolute worst case – where you cannot get it under control even after lowering temperature and pressures as low as you can, you could very slowly open the drain valve on the counterpressure tank and allow it to slowly drop to atmospheric pressure before raising the heads. Although certainly not ideal, with a little practice, this will not be a bad tradeoff for being able to package a particularly “ANGRY” beverage.

        Continue reading

        BOTTLING DEMONSTRATION FOR FINGERLAKES NY BREWERIES AND WINERIES


        BOTTLING DEMONSTRATION FOR FINGER LAKES, NY BREWERIES AND WINERIES

        Our team had a successful demo with breweries & wineries at Fleur de Lis Brewworks in Seneca Falls, NY on April 4th, 2018!

        Seeing a semi automatic bottling equipment demonstration helps craft beverage producers know what bottling line is right for them! We invited local craft beverage producers for a free demo of the Microbottler and lunch at a beautiful location.

        The idea for a bottling demonstration at this location was born at Empire Farm Days when we met the owners and brewmasters of Fleur de Lis Brewworks, Craig and Jon Paul Partee.

        The Partee brothers opened in May 2017 and are very welcoming hosts for their beautiful New York farm brewery. Members of the NY Farm Bureau and part of the Fingerlakes Beer Trail, Fleur de Lis Brewworks is a unique place to enjoy some delicious NY craft beer!

        APRIL SHOWERS AND LINGERING MARCH WINDS DIDN’T HINDER THE DK TEAM!

        We loaded up the MicroBottler the day before so we could get an early start. Seneca Falls is about four hours from our shop in Fort Edward, NY. Par for the course with this spring’s weather patterns, we ran into some cold, blustery April showers when we were unloading and on our return trip.

        DEMONSTRATION AND OPPORTUNITY TO TRY IT OUT

        Guests came from over three hours away to learn more about the MicroBottler. We gave a little history on how DK Advanced Technologies began. It was all because friends at a local brewery couldn’t find an affordable bottling line that would fit in their brewhouse!

        Our team gave a great overview of the machine’s operation, how to set up your bottling workspace for efficient flow, basics of filling and crown capping. The group had some great questions about changing bottles, and were excited how easily (and affordably!) the MicroBottler can switch packaging shapes and sizes.

        DIDN’T MAKE IT TO OUR DEMO? FIND OUT MORE ABOUT US.

        ENJOYING LUNCH, FLEUR DE LIS ROOT BEER AND CRAFT BREWS

        Everyone enjoyed some lunch from a local restaurant, as well as some samples of Craig and Jon Paul’s root beer and craft brews. After lunch, a few participants stepped up to try bottling themselves. One brewery owner shared that she felt much more comfortable with the bottling process after trying it herself. Mission accomplished.

        THANK YOU TO FLEUR DE LIS BREWWORKS!

        Fleur de Lis owners Jon Paul and Craig were gracious hosts. We enjoyed giving the demonstration and bottling a few of their beers later that afternoon. Be sure to check out their limited release bottles!

        WANT TO HOST A BOTTLING DEMONSTRATION AT YOUR LOCATION?

        OR VIDEO CHAT FOR A PERSONALIZED TOUR OF THE MICROBOTTLER’S OPTIONS? CONTACT US!

        Continue reading

        Great Craft Beer Gift Ideas for the Craft Beer Lovers in Your Life!


        GREAT CRAFT BEER GIFT IDEAS
        FOR THE CRAFT BEER LOVERS IN YOUR LIFE!

        We all know someone who’s a big craft beer lover and you might want to get them a gift that goes along with their passion for beers. But what do you get? With so many gift ideas out there it might be hard to choose a favorite.

        Here’s a list of craft beer gift ideas that we recommend (and wouldn’t mind getting ourselves).


        • 1. BOTTLE OPENERS


          You can never go wrong with a nice bottle opener. No matter what it will always come in handy. Check out this 
          list of some of the coolest and most unique bottle openers out there! A wall mounted one is great to have in the house if they don’t already have one!

        • 2. CRAFT BEER GLASSES

          What’s better than a craft beer? A craft beer in a specially designed glass. Glasses designed for craft beers brings out much more flavor than a regular pint glass. 

          Spiegelau makes some great glassware for all sorts of different craft beers. We recommend you check them out to get some quality glasses. They also have a tasting kit with three different glasses if you’re not sure what beer they prefer. Shop the glasses here.

        • 3. PRESSURIZED GROWLER

          This is one of the most practical craft beer gift ideas you could get your fellow craft beer lover. A pressurized growler will keep a growler of their favorite beer fresh and carbonated for weeks! GrowlerWerks has a good lineup of some of the best pressurized growlers on the market.

        • 4. USA BEER CAP MAP

          This is a fun one to get. It combines patriotism and beer, you can’t beat that. Not only is it a decorative piece but you get to customize it! Place your own bottle caps in it to create your own unique art piece. Check it out here!

        • 5. BEER BOTTLE CHILLING COASTER SET

          Having your beer get warm after opening it is one of the worst things that can happen. These coasters take away that problem. Just store them in your fridge and take them out when its time to drink. They’ll keep your drink cold and refreshing the entire time you’re drinking!

        • 6. REGRAINED BARS

          Regrained takes the spent grain from breweries and turns them into power bars. With three unique flavors these bars are delicious and fun to eat. Knowing that you’re eating the grain that was used to make beer makes it taste that much better!

        Continue reading

        MICRORINSE ADD-ON FOR THE MICROBOTTLER


        MICRORINSE ADD-ON FOR THE MICROBOTTLER

        Is rinsing and drying after filling and capping bottles making you feel like you’re on a water park ride?

        WASH & DRY FILLED BOTTLES, WITH THE MICRORINSE!

        The MicroRinse is an accessory for the semi-automatic filling and capping MicroBottler. It can be added when your machine is built or retrofitted to existing machines. It attaches to the machine to the right of the capper and allows bottles to be slid through in their totes. Wash and dry your filled bottles after they are capped with the MicroBottler.

        WATER AND PNEUMATIC OPERATION

        This MicroBottler accessory is self-contained and self-actuated. Like a mini-car wash, it sprays off bottles and blows off excess water. The MicroRinse connects with a standard garden hose fitting and ARO air fitting. You do not need the compressed air accessory on your MicroBottler to run this add-on.

        SPECS AND REQUIREMENTS:

        • Requires an air compressor with at least a 60 gallon tank and capable of producing 15CFM at 90PSI.
        • No extra space required, fits within MicroBottler footprint.
        • Supports all sizes of bottles that the MicroBottler can fill and cap.
        • Works with standard MicroBottler cover.

        FIND OUT MORE ABOUT THE MICRORINSE!

        Contact us today for pricing.

        Continue reading

        Coffee Bottling Made Easy


        COFFEE BOTTLING EQUIPMENT: ICED & COLD BREW COFFEE BOTTLING MADE EASY!

        With cold brew coffee on the rise, more and more coffee brewers are bottling their product.
        Coffee connoisseurs are loving the variety of iced coffees and cold brewed coffees on the market, many of them coming from small, local coffee makers.

        In a sense, coffee has become a popular craft beverage – much like beercider, and soda!

        If you’re a coffee enthusiast looking to launch your own line of cold brew coffee, you’re going to need the right coffee bottling equipment and supplies to be successful. That’s where we come in!

        Bottle Iced and Cold Brew Coffee Efficiently

        At DK Advanced Technologies, we’ve developed a small scale beverage bottling line that works for a variety of craft beverages, including coffee! Our MicroBottler® – originally designed for small scale beer bottling – is perfect for bottling iced coffee easily and efficiently.

        The MicroBottler® is the only bottler of its kind on the market.
        Intended for small scale operations, it is compact in size yet incredibly versatile. It can accommodate bottles ranging in size from 6 to 25 ounces (750 mL), and can be easily adjusted to change between sizes and bottle types.

        The MicroBottler® features an easy to use operation panel with a timer and can be easily operated by one person. It’s affordably priced and requires minimal maintenance, making it a great investment for new coffee brewers looking to enter the cold brew coffee market.

        Cold Brew Coffee Bottling Machine Features

        Some key features of the MicroBottler® that are especially helpful to those brewing — and bottling — coffee are:

        • Accommodates bottles of various sizes and styles
        • You can bottle with nitrogen or other gases with the MicroBottler®
        • Combines the bottling and capping processes on one bottling line
        • Can be paired with a number of add-ons and accessories to further simplify the coffee bottling process
        • Can be easily reconfigured
        • Can be operated by one individual
        • Requires minimal maintenance and upkeep!

        Learn More About Bottling Cold Brew Coffee With the MicroBottler®!

        Interested in learning more about how the MicroBottler® can help your cold brew or iced coffee bottling efforts? Find more details about the MicroBottler® here, or give us a call at (518) 747-0626 or contact us online!

        Want more insight and updates from our team? Be sure to follow us on Facebook!

        Continue reading